Today, I wanted to share with you my first desk revamp. This desk was an experiment from beginning to end.
It all started when I went on our church’s ladies retreat to the coast. My friend Wendie and I went on road trip searching for special treasures at local shops. We both were looking for something to either fix up or create into something beautiful. She found this desk and asked if we wanted to go in on it together. I said okay and that’s where it began.
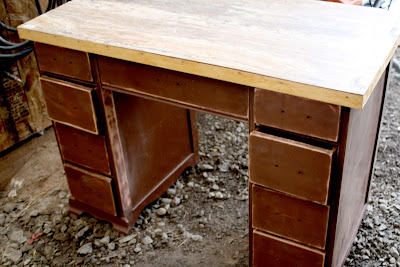
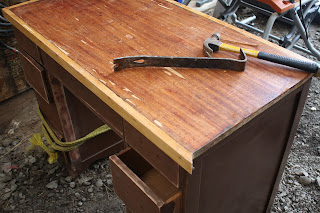
Later on, after it was sitting at my home I took the first step and removed the ugly fake top. It was piece was a nasty fake brown marble laminated glued to a particle board. Who would want this in their house?
I took off the rusty drawer handles (sorry. no before pic) and set them aside. I really liked the detail on them but they needed a little DIYing.
Here's the desk before:
I called Wendie to see if she’d want to give me a hand. She accepted and made her way to my house. Before we painted I tried a peeling trick I had on hand. Soap. I rubbed it where I didn’t want the paint to show thru. When the paint dried, I rubbed down to reveal the wood underneath. Later, I applied a stain that made it look old and distressed. I finished it off with clear water-based poly from Rust-Oleum.
While this was drying, I took the rusted handles and gave them a good spray of WD-40 so they wouldn’t be hard to pull. Then I washed it away and let them dry. Afterwards, I sprayed them with Rust- Oleum’s Rust Reformer and then I applied a white glossy enamel for the final finish.
In replacing that ugly top I needed something more study and beautiful. I decided to use a solid pine board, put a stain and give it a good MinWax to seal it. I glued the top with liquid nails to make it stay together. When everything was done drying I put it all back together. Inside the drawers, I modged podged them with decorative paper to make them all pretty. Then it was complete. So what do you think??
Here's the desk after:
Afterwards, Wendie to come over and see what had been done and we took it down to a local shop to sell.
While trying out these different tricks to revamp a piece I realized how much I loved it in the process. It was something new and exciting. I can’t wait to do my next one!
I hope this project will inspire you to try new things! Thanks for stopping by!
Jenn
FYI: If I had known how messy the soap trick was I wouldn’t have done it. I realized on other projects that vaseline is WAY MORE AWESOME to work with!


Jennifer!!! I LOVE THIS!! The paper inside adds so much, I am totally using that, you are wonderful!
ReplyDeleteLove your guts
mandi
Thanks Mandi! I love your work and how many amazing things up come up with. It's so awe-inspiring!
ReplyDeleteJenn